How to Restore Foggy Headlights (And Why They Fog Again)

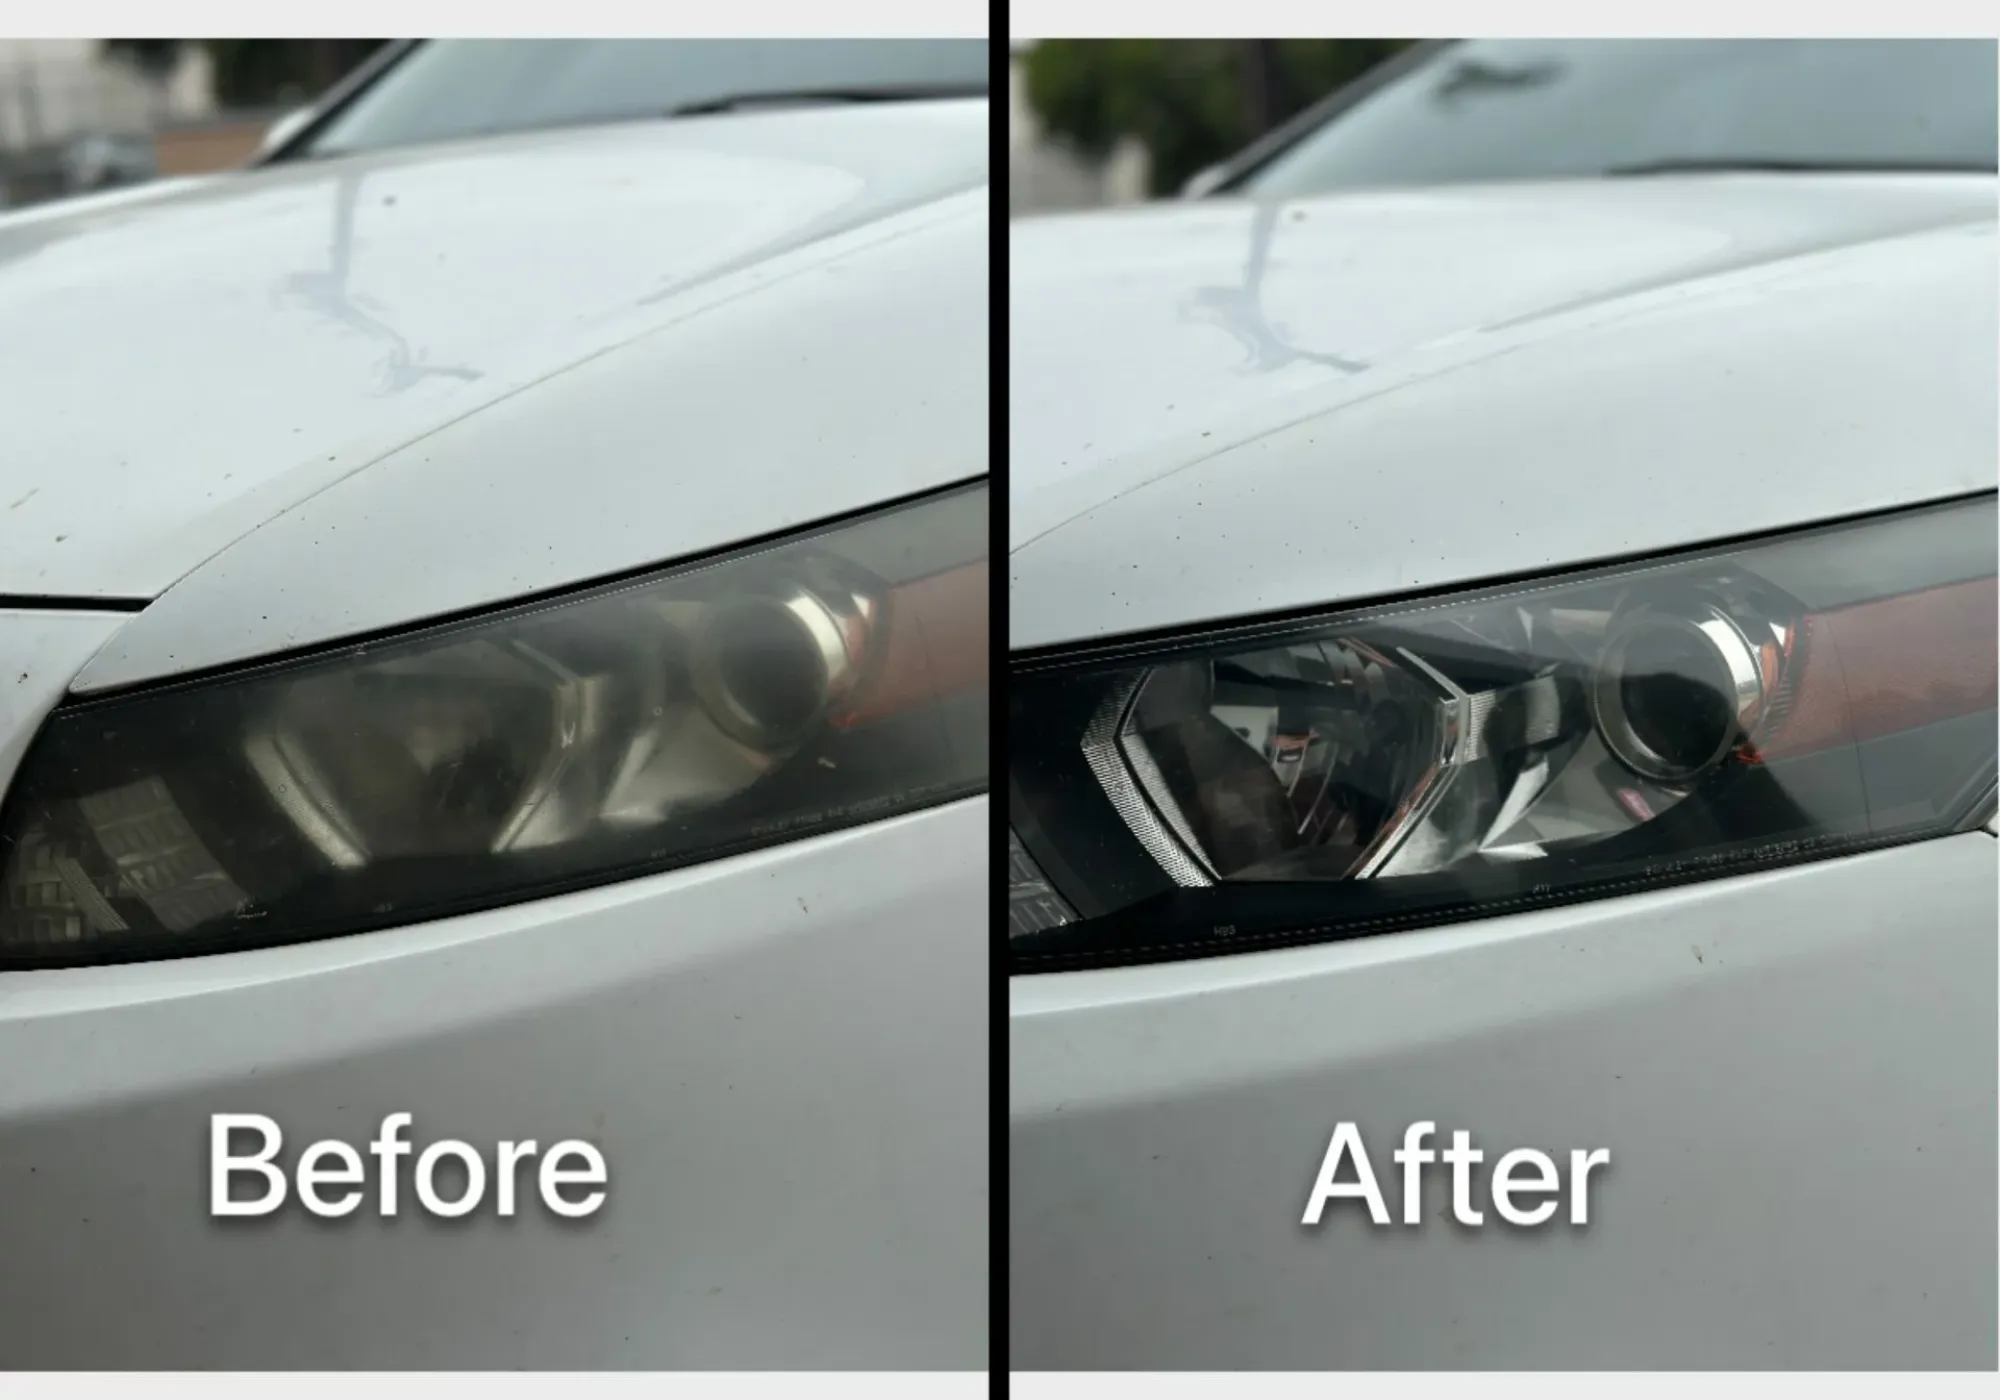
Short answer: foggy headlights are caused by UV breaking down the factory coating on the outside of a polycarbonate lens. If the haze is on the outside, polishing removes the degraded layer and clarity comes straight back. If the fogging is on the inside, no amount of polishing will touch it, because the damage is behind the glass. Test which one you have before buying anything. Then, whichever method you use, seal the lens afterwards, because an unprotected lens fogs again within weeks.
That last point is where most restorations fail. Plenty of guides walk you through sanding a lens clear and then stop, which is why so many people report their headlights going yellow again a month later.
First: is the haze inside or outside?
This is a thirty-second test and it decides everything.
Run a fingertip firmly across the hazy area of the lens. Then look at the lens from an angle in good light.
- The surface feels slightly rough or chalky, and the haze looks like it sits on the face of the lens. This is outside oxidation. It is the common case, and it is fixable.
- The surface feels perfectly smooth and glassy, but the lens still looks cloudy or milky. The problem is on the inside. Polishing the outside will achieve nothing.
- You can see water droplets, a tide mark, or a dusty film behind the lens. Moisture has got into the housing, usually through a failed seal or a cracked vent.
Internal fogging is a sealing problem, not a polishing problem. The housing needs drying out and the leak finding, or the unit needs replacing. No product applied to the outside will help, and anyone selling you one for that purpose is not being straight with you.
The rest of this guide assumes outside oxidation, which is the great majority of foggy headlights.
Why headlights fog in the first place
Modern lenses are polycarbonate rather than glass. Polycarbonate is light, tough and almost impossible to shatter, which is exactly what you want in front of a bulb at 70mph.
Its weakness is ultraviolet light. Manufacturers spray a UV-resistant hard coat onto the lens at the factory to protect it. That coating has a service life, typically somewhere between five and ten years depending on climate and whether the car lives outdoors.
Once the coat breaks down, UV starts working on the polycarbonate itself. The surface oxidises, goes microscopically rough, and scatters light instead of passing it cleanly. That scattering is the yellow haze you see, and it is why fogged headlights throw so much less usable light down the road.
Two things follow from this. First, the damage is a thin layer at the surface, which is why removing it works. Second, once you remove it you have also removed whatever was left of the factory UV coat, which is why sealing afterwards is not optional.
The household remedies, honestly assessed
Search this topic and you will find toothpaste, baking soda, vinegar and bug spray recommended constantly. Here is a straight answer on each.
Toothpaste. Toothpaste is a very mild abrasive designed to be safe on tooth enamel. On a lightly hazed lens it will lift a little surface grime and produce a small, temporary improvement. On genuinely UV-degraded polycarbonate it removes almost nothing, because the degraded layer is harder and deeper than toothpaste can reach. It is not dangerous, it is just mostly ineffective.
Baking soda and vinegar. The two react and fizz, which looks like something is happening. Chemically, the reaction produces carbon dioxide, water and sodium acetate, none of which do anything to oxidised polycarbonate. Any improvement comes from the mild scrubbing, not the chemistry.
Bug spray. This one deserves a clear warning. Insect repellent containing DEET appears to work because DEET is a solvent that attacks and partially dissolves the surface of polycarbonate. You are not cleaning the lens, you are melting a thin layer of it. The result looks clearer for a few days and then goes cloudy and crazed far worse than before, and the damage cannot be reversed. Do not do this.
The reason these methods persist is that they produce a visible short-term change on camera. They do not fix the underlying problem.
What actually works
There are two legitimate approaches, and which you need depends on how far gone the lens is.
Light to moderate haze: polish only
If the lens is yellowed and dull but still reasonably smooth, a dedicated lens polish removes the oxidised layer without sanding. This is the route most people should try first, because it is quicker, has no risk of leaving sanding marks, and on a moderately hazed lens it is often all that is required.
Lens Gloss is formulated for exactly this: polycarbonate lens restoration without sandpaper or a machine.
Heavy haze with roughness or pitting: sand, then polish
If the lens surface is visibly rough, deeply yellowed, or has a flaking clear coat, polish alone will not get there. The degraded layer has to be sanded back with progressively finer wet paper, then polished to bring the clarity up.
Be honest with yourself about which category you are in before you reach for sandpaper. Sanding is not reversible, and a badly sanded lens looks worse than a hazy one.
Step by step: the polish method
- Park in shade and let the car cool. Working on a hot lens in direct sun makes product flash off before it can do anything.
- Wash the lens and the surrounding paint. Grit dragged across a lens leaves fine scratches that are then permanent additions to your problem.
- Mask around the lens. Two strips of painter’s tape along the paint edges. Takes a minute and stops you polishing your paint by accident.
- Apply a small amount to a microfiber applicator. Not to the lens directly. A little goes further than people expect.
- Work in small sections with firm, overlapping passes. Straight lines rather than circles. If any fine marking does occur, straight-line marks are far less visible than circular swirls, which catch light from every angle.
- Watch the applicator. It will pick up a yellow or brown tint. That is the oxidised polycarbonate coming off, and it is the clearest sign the product is working.
- Buff off with a clean, dry microfiber and inspect from several angles in good light.
- Repeat where needed. Heavily hazed lenses take two or three passes. Work the worst areas rather than the whole lens each time.
- Seal it. This is the step that determines whether you are doing this again in a month or in two years.
Sealing: the step that decides how long it lasts
When you finish polishing, the lens is clear and completely unprotected. The factory UV coat is gone, either degraded away or removed along with the oxidation. Bare polycarbonate in sunlight will begin oxidising again immediately, and on a car parked outdoors you can see the haze returning within a few weeks.
Applying a sealant over the freshly polished lens puts a UV barrier back. Sealer Gloss works on lenses as well as metal and paint, and holds for months rather than weeks.
This is the single biggest difference between a restoration that people are pleased with a year later and one they complain about in October. It also explains most of the negative reviews you see for headlight restoration kits generally: the kit worked, the lens was never protected, and the fog came back.
Why this matters beyond appearance
A hazed lens scatters light rather than projecting it. The beam pattern your headlight was designed to produce, with a sharp cutoff that lights the road without blinding oncoming traffic, stops working properly. You get less light where you need it and more glare where you do not.
It is also an easy MOT or inspection failure in many jurisdictions, and it makes a car look considerably older than it is, which matters at resale.
When to stop and replace the unit
Restoration is not always the right answer. Replace rather than restore when:
- The fogging is internal. Covered above. Polishing the outside cannot reach it.
- The lens is cracked. Water will keep getting in regardless of how clear you make the surface.
- The polycarbonate has gone brittle and crazed, with a fine network of cracks through the surface rather than a smooth haze. This is deep UV damage and it is structural.
- The reflector behind the lens has gone dull or peeled. The mirrored surface inside does most of the work of aiming light. If it has failed, a perfectly clear lens will still throw a poor beam.
Shine a torch into the housing to check the reflector before spending an afternoon on the lens.
Keeping them clear
- Reseal every few months. Far less work than restoring again.
- Park in shade or a garage where you can. UV exposure is the entire cause.
- Wash lenses when you wash the car. Road film holds moisture and grime against the surface.
- Catch it early. A lightly hazed lens is a fifteen minute job. A badly oxidised one is an afternoon with sandpaper.
Frequently asked questions
Does toothpaste really clean foggy headlights?
Barely. Toothpaste is a mild abrasive designed to be safe on tooth enamel, so it lifts light surface grime and can produce a small temporary improvement. It does not remove UV-degraded polycarbonate, which is the actual cause of fogging, so the haze returns almost immediately.
Why do my headlights fog up again after restoring them?
Because the lens was not sealed afterwards. Restoration removes the oxidised layer along with whatever remained of the factory UV coating, leaving bare polycarbonate exposed to sunlight. Without a sealant, oxidation starts again straight away and the haze can return within weeks.
Can you fix headlights that are foggy on the inside?
Not by polishing. Internal fogging is moisture inside the housing from a failed seal or a cracked vent. The housing needs opening and drying and the leak fixing, or the unit needs replacing. Nothing applied to the outside of the lens will reach it.
Is bug spray safe for restoring headlights?
No. Insect repellent containing DEET is a solvent that partially dissolves the surface of polycarbonate. It looks clearer for a few days, then the surface clouds and crazes far worse than before, and the damage cannot be undone.
Do I need to sand my headlights?
Only if the lens is visibly rough, deeply yellowed, or the coating is flaking. Moderate haze on a smooth lens usually comes up with polish alone, which is quicker and carries no risk of leaving sanding marks. Sanding is not reversible, so try polishing first.
How long does headlight restoration last?
Unsealed, often only a few weeks on a car parked outdoors. Sealed properly after restoration, the clarity holds for months, and resealing periodically extends it further.
Will restoring my headlights make them brighter?
Yes, noticeably, provided the reflector behind the lens is still in good condition. A hazed lens scatters light instead of projecting it, so clearing it restores both the amount of light reaching the road and the proper beam pattern.
Can I use metal polish on headlights?
Use a product formulated for polycarbonate lenses rather than a metal polish. Lens Gloss is designed for the plastic, whereas metal polish is designed for a much harder surface and is not the right tool for a lens.
Getting started
Do the inside-or-outside test first. If the haze is on the surface, a lens polish will clear it, and sealing afterwards is what keeps it clear.
Lens Gloss handles the restoration, and Sealer Gloss puts the UV barrier back. The bundles pair them at 10% off, which covers both halves of the job rather than discovering halfway through that you are missing the important one.