How to Remove Oxidation from Aluminum (Wheels, Boats and RVs)

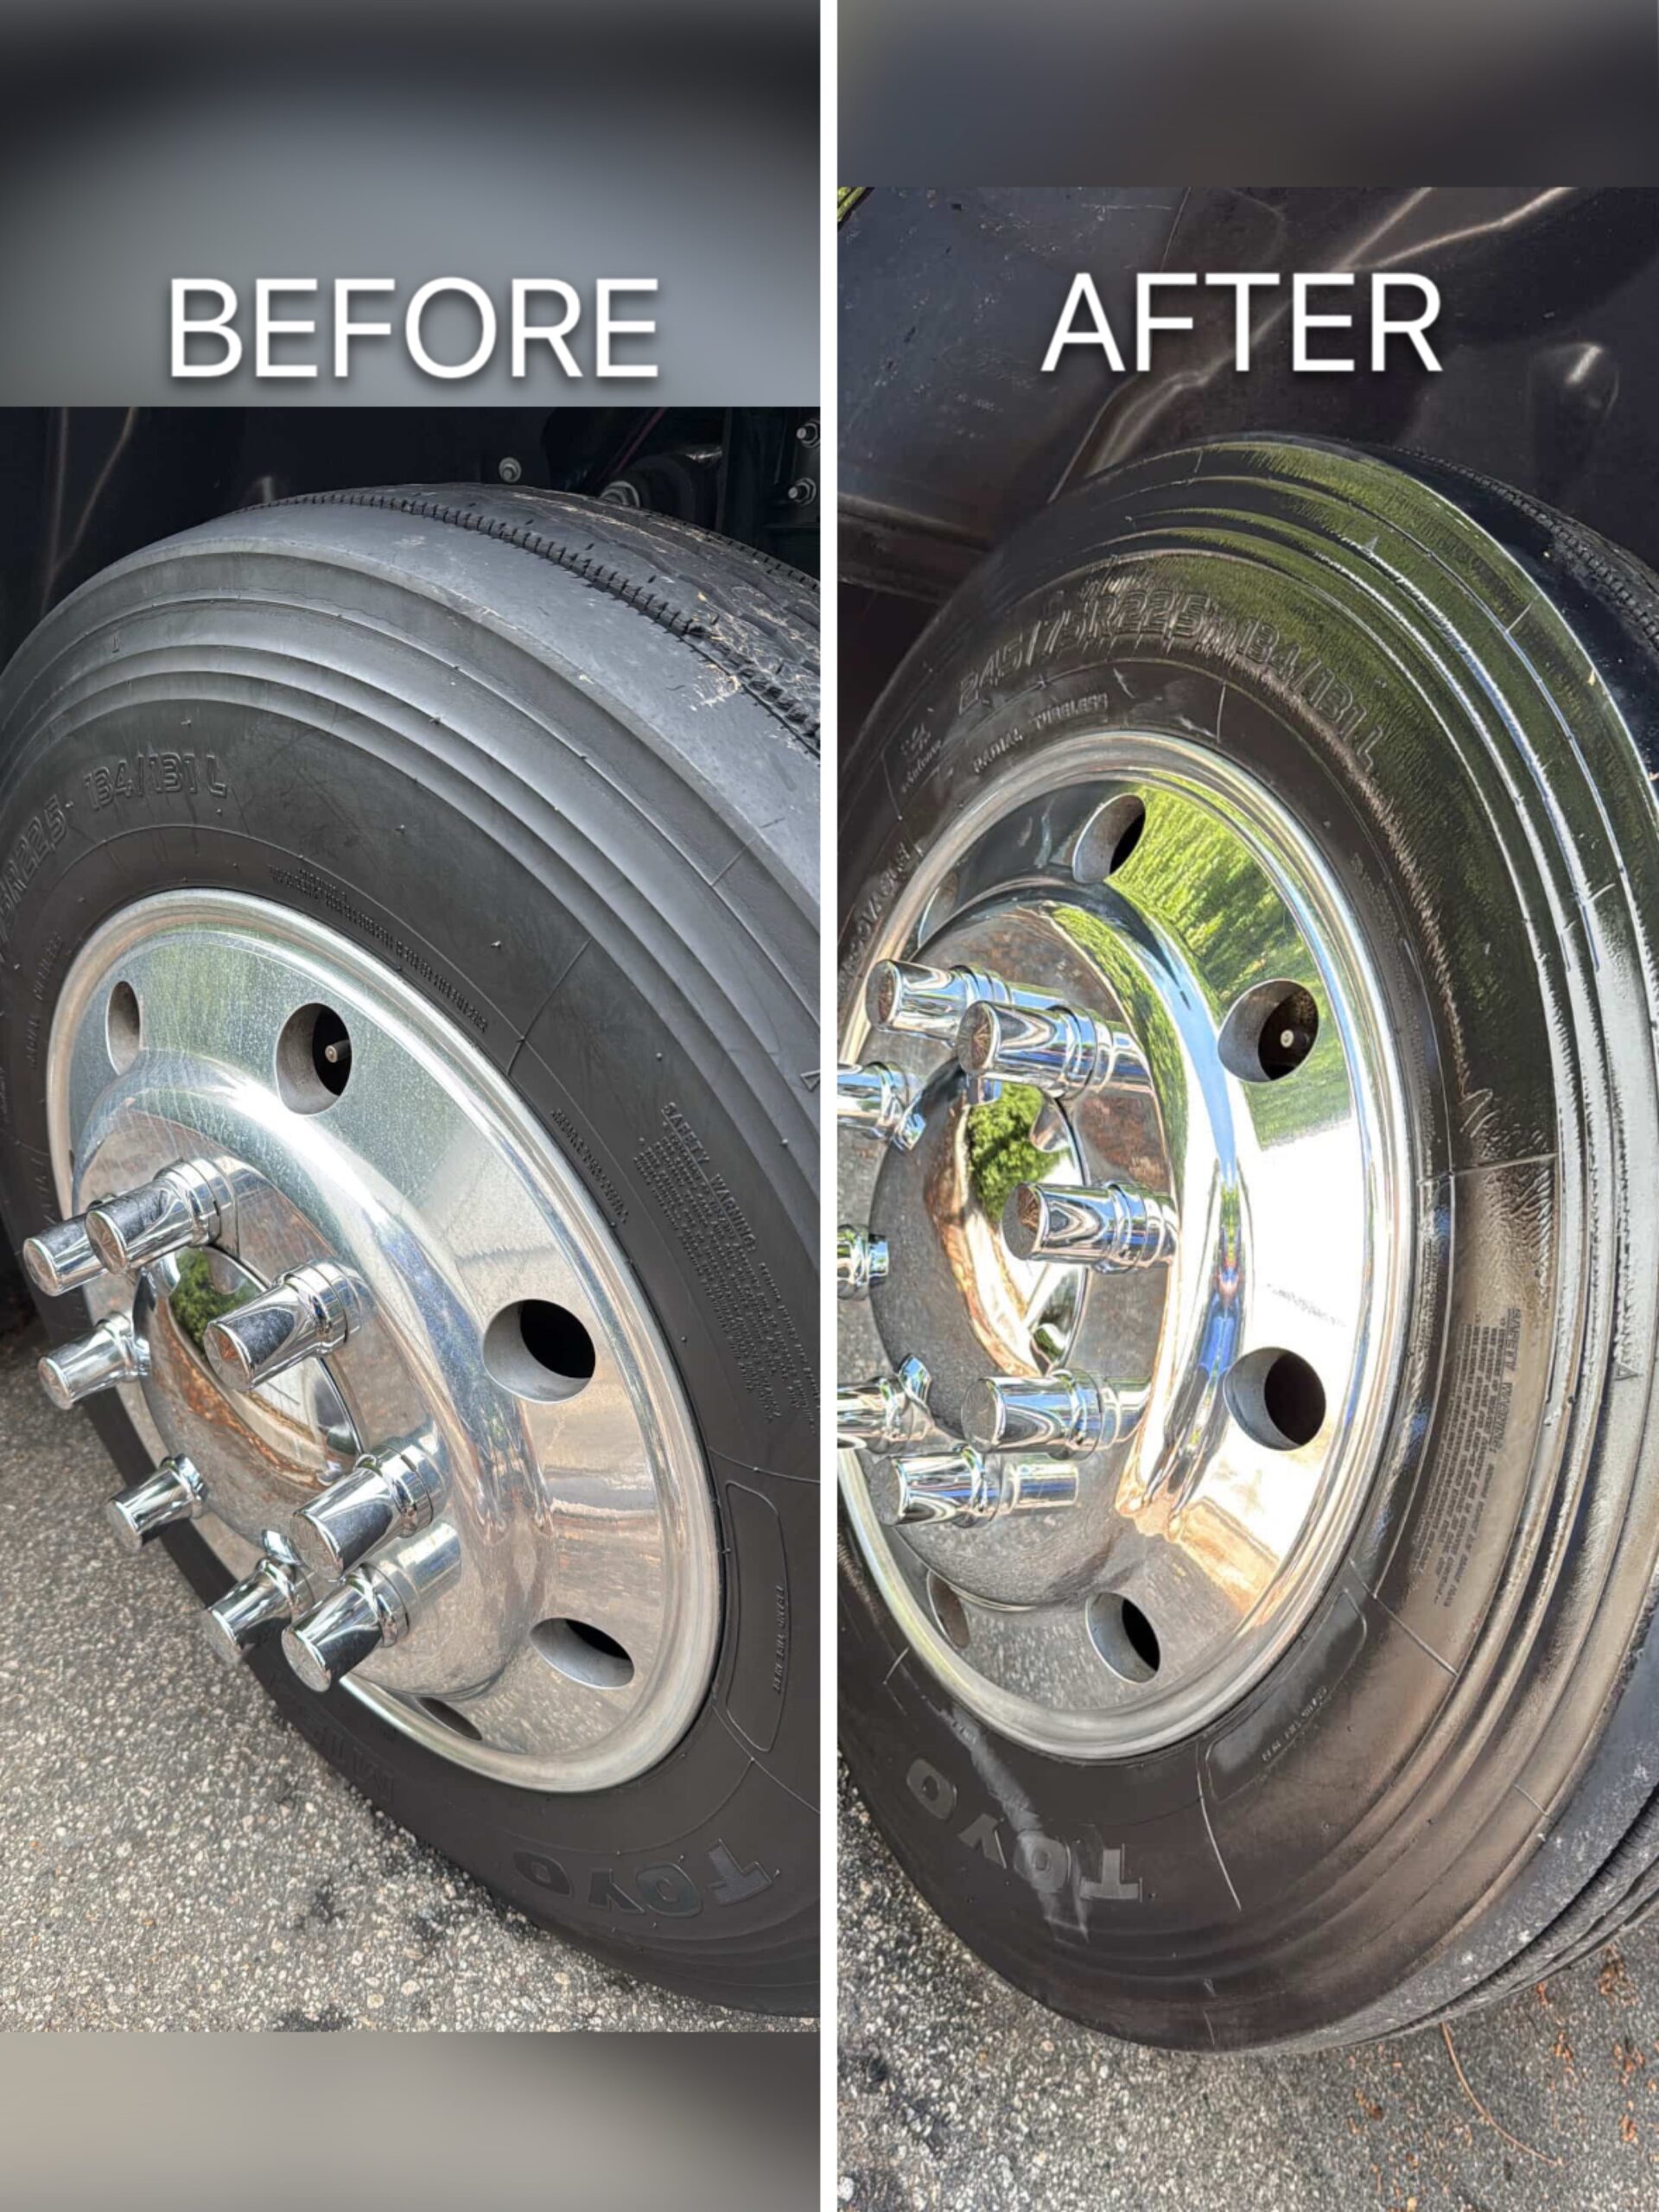
Short answer: to remove oxidation from aluminum, wash and dry the surface, then work a non-abrasive metal polish in with a microfiber cloth in small sections using firm, overlapping passes. The cloth will turn black as the oxide layer lifts. Buff clean with a fresh towel, repeat on heavily oxidized areas, and seal the finish to stop it returning. On most aluminum you will see results in the first pass, by hand, without a machine.
That is the whole process. The rest of this guide covers why aluminum oxidizes in the first place, how to handle the surfaces that give people the most trouble, and the mistakes that turn a straightforward job into a long afternoon.
What aluminum oxidation actually is
Aluminum does not rust. Rust is iron oxide, and there is no iron in aluminum. What aluminum does instead is form a layer of aluminum oxide the moment bare metal meets air.
That layer is doing a job. It protects the metal underneath from corroding further, which is why aluminum survives outdoors far better than steel does. The problem is purely cosmetic: aluminum oxide is dull, chalky and grey, and it gets thicker the longer it is left. What started as a mirror finish ends up looking like unfinished concrete.
Salt accelerates it badly, which is why boat owners and anyone driving through winter road treatment see it worst. Heat accelerates it too, which is why the aluminum nearest an exhaust dulls first.
Removing oxidation means removing that built-up oxide layer to expose the bright metal underneath. It is not a chemical reaction or a repair. It is lifting a layer off.
What you need
- A non-abrasive metal polish. This matters more than anything else on the list, and we cover why below.
- Two or three clean microfiber towels. One for applying, the rest for buffing off.
- Soap, water and a hose for the wash-down first.
- A foam applicator pad if you have one. Useful but not essential.
- A dual-action polisher only if you are doing a large area like an RV side panel. Everything else is faster by hand than it is to set up a machine.
Why non-abrasive matters on aluminum
Aluminum is soft. It is far softer than the chrome or stainless steel people are used to working on, and it scratches under pressure that steel would shrug off.
Most metal polishes on the shelf cut oxidation off with abrasive grit. That works, and it works fast, but every pass takes a little metal with it and leaves a pattern of fine scratches behind. On chrome you might not notice. On polished aluminum you get a hazy, swirled finish that looks worse in direct sun than the oxidation did.
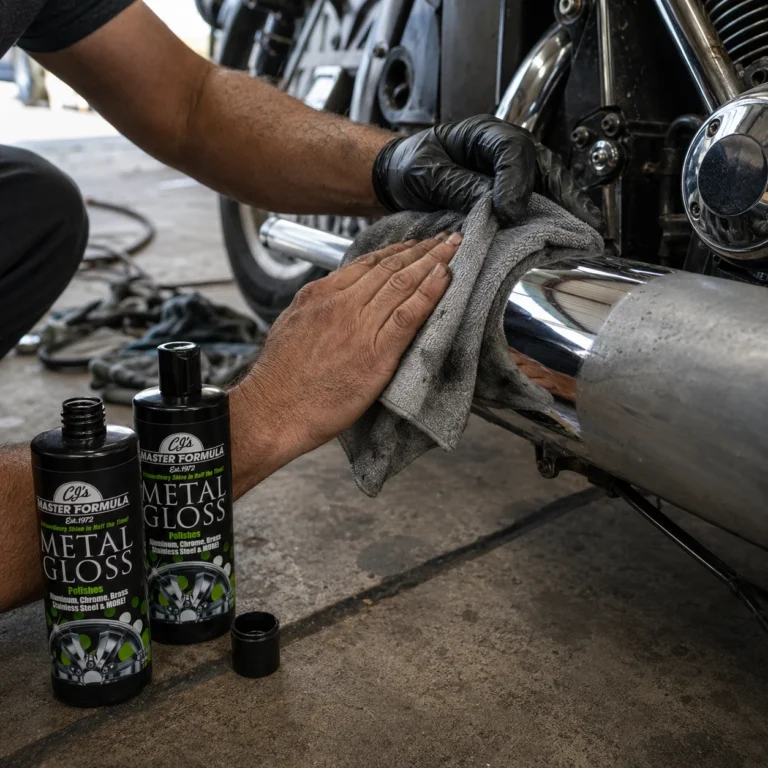
CJ’s Metal Gloss uses a jewelers’ rouge formulation rather than abrasive grit. Jewelers’ rouge is the same class of compound used to finish precious metals, where removing material is not an option. It lifts the oxide layer without cutting into the aluminum underneath, which is why the same bottle works on a truck wheel and a piece of silver flatware.
We have been mixing this formula in the USA since 1972, and the non-abrasive approach is the reason it is still the same formula.
Step by step
1. Wash and dry completely
Skip this and you will regret it. Polishing over road grit, brake dust or sand drags those particles across the surface under pressure. That is how you put scratches into aluminum that were not there before.
Wash with soap and water, rinse properly, and dry fully. Water trapped in a crevice will run out mid-polish and streak the section you just finished.
2. Work one small section at a time
Put a small amount of polish on your cloth or applicator. A little goes further than people expect, and overloading the cloth just wastes product and makes the buff-off harder.
Pick a section about the size of your hand. Work the polish in with firm, overlapping passes. Firm is the operative word: light passes just spread product around without lifting anything.
3. Watch the cloth
Within a few passes the cloth will start turning black. That black is the oxide layer coming off the metal and onto your towel. It is the clearest signal in the whole job that the product is doing what it should.
If the cloth stays clean, either the surface was not as oxidized as it looked, or you are not pressing hard enough.
4. Buff off with a clean towel
Switch to a fresh microfiber and buff until the surface runs clear and bright. Buffing with the same cloth you applied with just moves the oxidation around.
5. Repeat where needed
Badly neglected aluminum, or anything with pitting, will need a second or third pass. Each pass takes off another layer and gets you closer to bright metal. This is normal and it is not a sign the product is failing.
6. Seal it
This is the step almost everyone skips, and it is why the shine disappears in a few weeks.
The moment you finish polishing, you have exposed bare aluminum to the air. Oxidation restarts immediately. Applying Sealer Gloss over freshly polished metal puts a barrier between the metal and the air, which holds the finish for up to six months depending on weather and how the vehicle is stored.
We wrote a full explanation of this in why sealing your metal and paint matters more than you think.
The surfaces that give people trouble
Aluminum wheels
Wheels are the most common job and the most satisfying. Get the wheel off the vehicle if you can, or at least turn the steering to full lock so you can reach the inner barrel.
Brake dust bakes onto wheels and behaves differently to plain oxidation. If the wheels have not been touched in a year or more, a dedicated pre-clean with Cleaner Gloss first will save you a lot of effort, because you are not asking the polish to do the cleaner’s job as well as its own.
Expect a full set of four wheels to use a good portion of a bottle in one session. That is normal for a first restoration, and maintenance passes after that use far less.
Boat rails, cleats and props
Salt is brutal on aluminum and stainless alike. Rinse with fresh water first, always, because polishing salt crystals into a rail is the fastest way to scratch it.
Marine hardware usually needs more passes than automotive because the oxidation is thicker. Sealing afterwards matters more here than anywhere else.
RV and trailer siding
This is the one job where a dual-action polisher genuinely earns its place, simply because of the surface area. Work in sections, keep the pad clean, and be aware that older RV panels sometimes have a clear coat over the aluminum. If yours does, you are polishing the coating, not the metal, and the results will look different.
Diamond plate and toolboxes
The textured pattern traps oxidation in the low spots. A soft brush or a folded cloth pushed into the pattern works better than a flat pad, which only touches the high points.
Mistakes that cost people an afternoon
- Polishing a hot surface. Work in shade on cool metal. Polish dries too fast in direct sun and becomes difficult to buff off.
- Using one cloth for everything. Once a towel is loaded with black oxide, it stops removing and starts smearing.
- Expecting one pass to fix ten years. Heavy oxidation is layered. Multiple passes are the method, not a workaround.
- Skipping the wash. Every scratch complaint we hear traces back to this.
- Not sealing. You did the work. Protect it.
Anodized and clear-coated aluminum
Worth knowing before you start: not all aluminum is bare.
Anodized aluminum has an electrically applied oxide coating, usually coloured. Polish will not restore anodizing, and once anodizing fails there is no fix short of stripping and re-anodizing.
Clear-coated aluminum is common on modern factory wheels. You are polishing the clear coat, not the metal. Polish will clean and brighten it, but it will not produce the mirror finish that bare aluminum gives.
Quick test: rub an inconspicuous spot with polish on a cloth. If the cloth turns black, you have bare aluminum. If it stays clean, you are on a coating.
How often should you do this?
Once you have brought aluminum back and sealed it, a pass every two to three months keeps it there. Maintenance passes are dramatically quicker than the first restoration because you are removing a thin film rather than years of buildup.
Vehicles kept outside, driven in winter, or used around salt water will need attention more often.
Frequently asked questions
Can you remove oxidation from aluminum by hand?
Yes. A non-abrasive polish, a microfiber cloth and firm pressure will remove oxidation from aluminum by hand on almost any surface. A machine polisher speeds up large areas like RV panels, but it is not required.
What is the black residue on my cloth?
That is the oxide layer transferring from the metal onto the towel. It is the sign the polish is working. Switch to a clean cloth once the first one is loaded.
Will polish remove pitting?
No. Pitting is a physical loss of metal, and polish cannot put metal back. Polishing will brighten pitted aluminum and make the pits less visible, but the surface will not return to mirror smooth without sanding and refinishing.
Is metal polish safe on soft aluminum?
Non-abrasive polish is. Abrasive compounds are what put fine scratches into soft aluminum. CJ’s Metal Gloss uses a jewelers’ rouge formulation rather than grit, so it lifts oxidation without cutting the metal.
How long does aluminum stay bright after polishing?
Unsealed, oxidation starts again immediately and dulling is visible within weeks. Sealed with Sealer Gloss, the finish typically holds for up to six months depending on exposure, weather and storage.
Can I use the same polish on the stainless steel next to it?
Yes. The same formula works on aluminum, chrome, brass, stainless steel, silver and gold.
Do I need to remove the wheels?
It is not essential, but it makes the inner barrel far easier to reach. If you are not removing them, turn the steering to full lock to expose as much of each front wheel as possible.
Ready to start
Most aluminum that looks past saving is not. The grey chalk on the surface is a layer, and layers come off.
If you are restoring a full vehicle, boat or RV, the Metal Gloss 2-Pack works out cheaper than buying twice, and most people go through the first bottle faster than they expect on a first restoration. If you want polish and protection together, the bundles pair Metal Gloss with Sealer Gloss at 10% off.
For wheels specifically, see our detailed guide on how to polish aluminum wheels, including how to tell bare, clear-coated and anodized wheels apart before you start.